PACO on DUNK.NEO
Blog
Projects
Articles
Photos
About Me
Contact

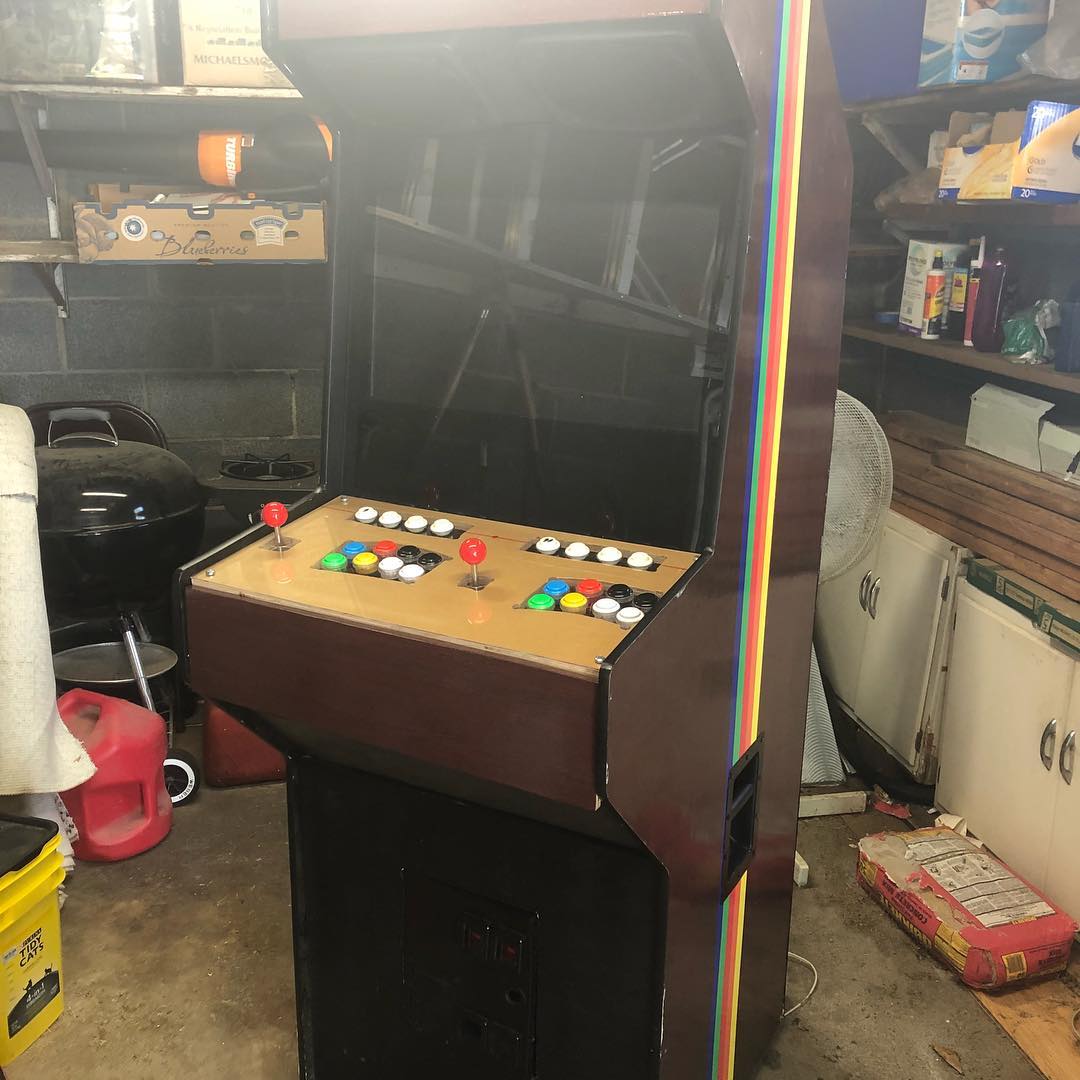
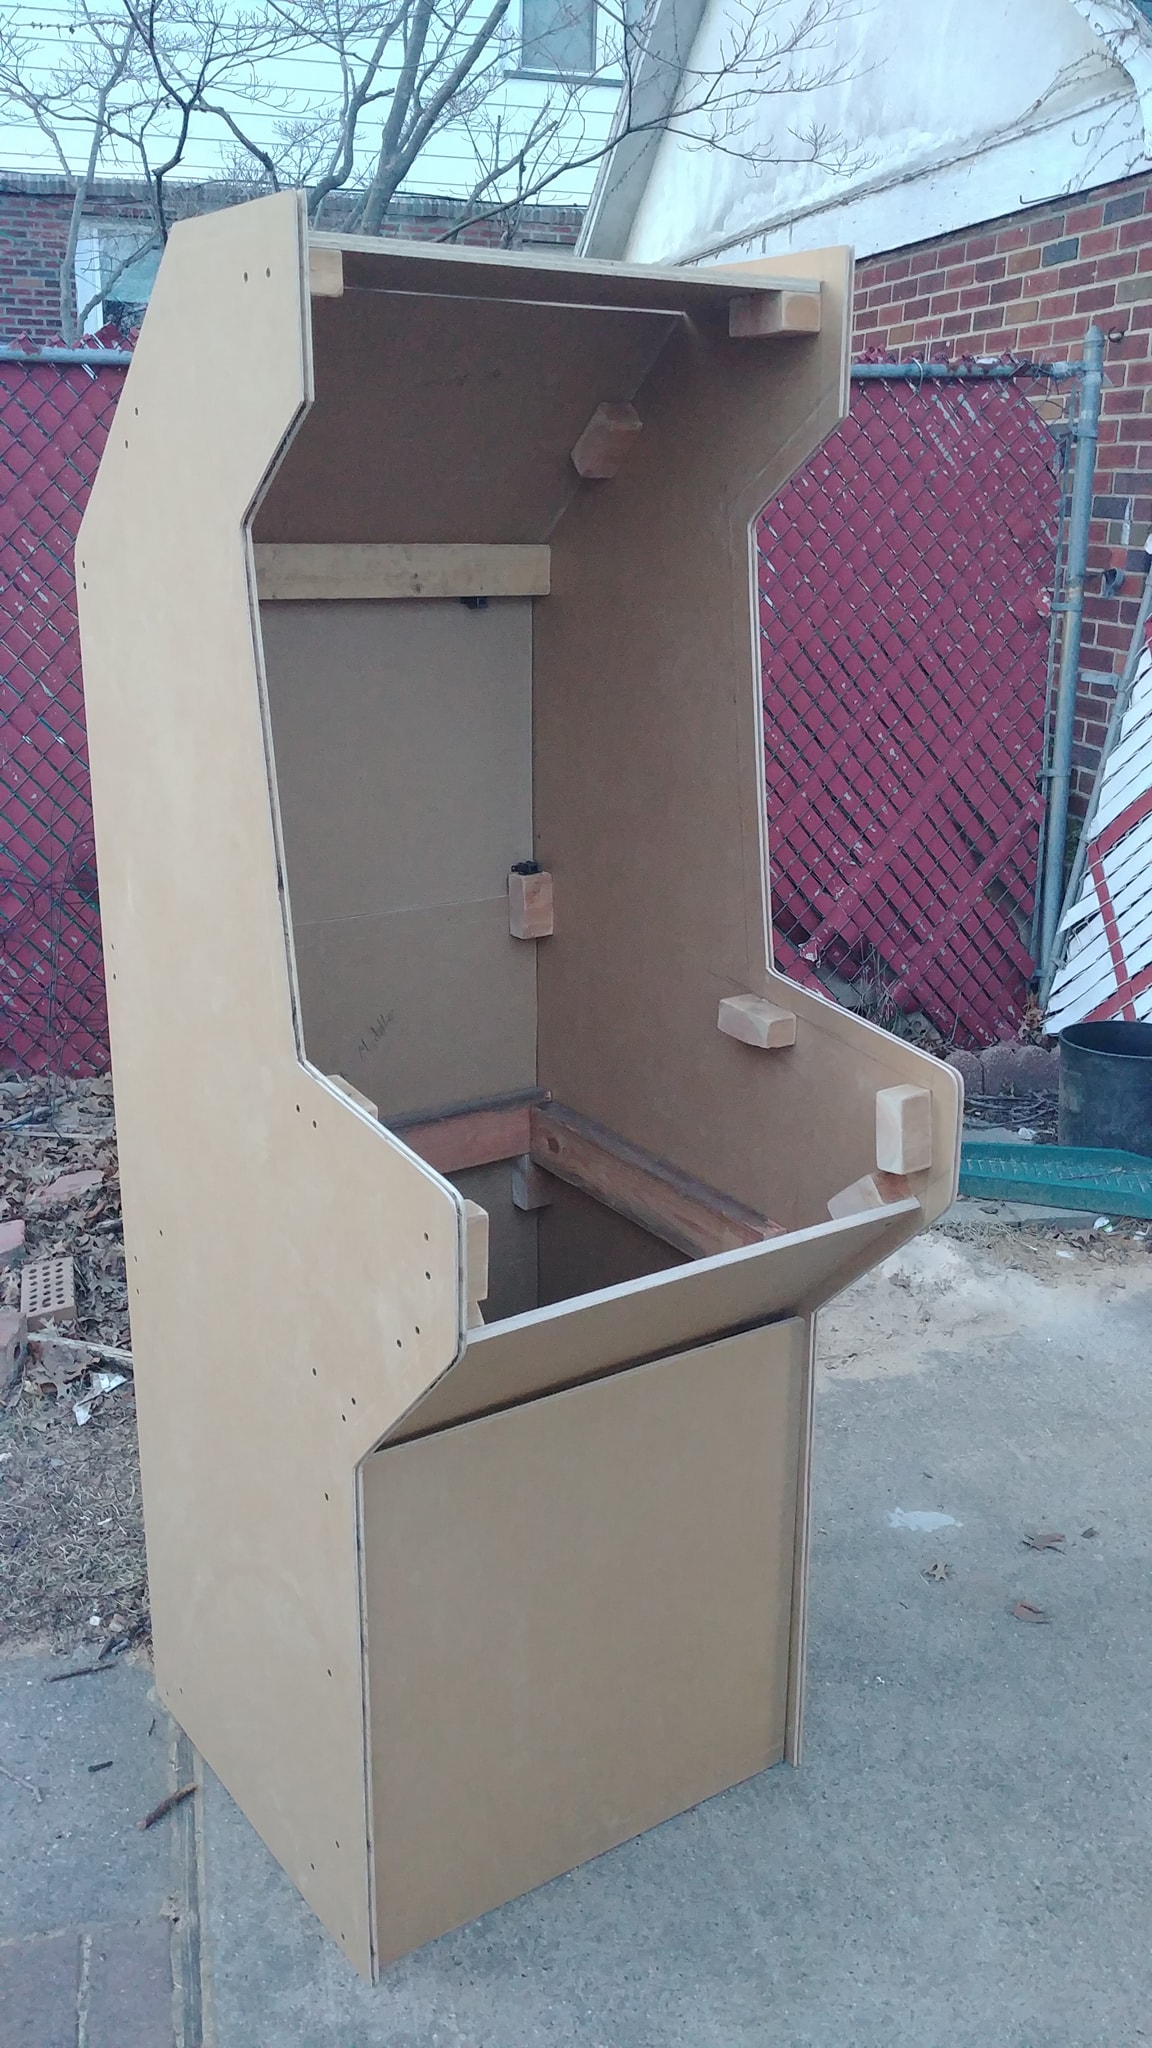
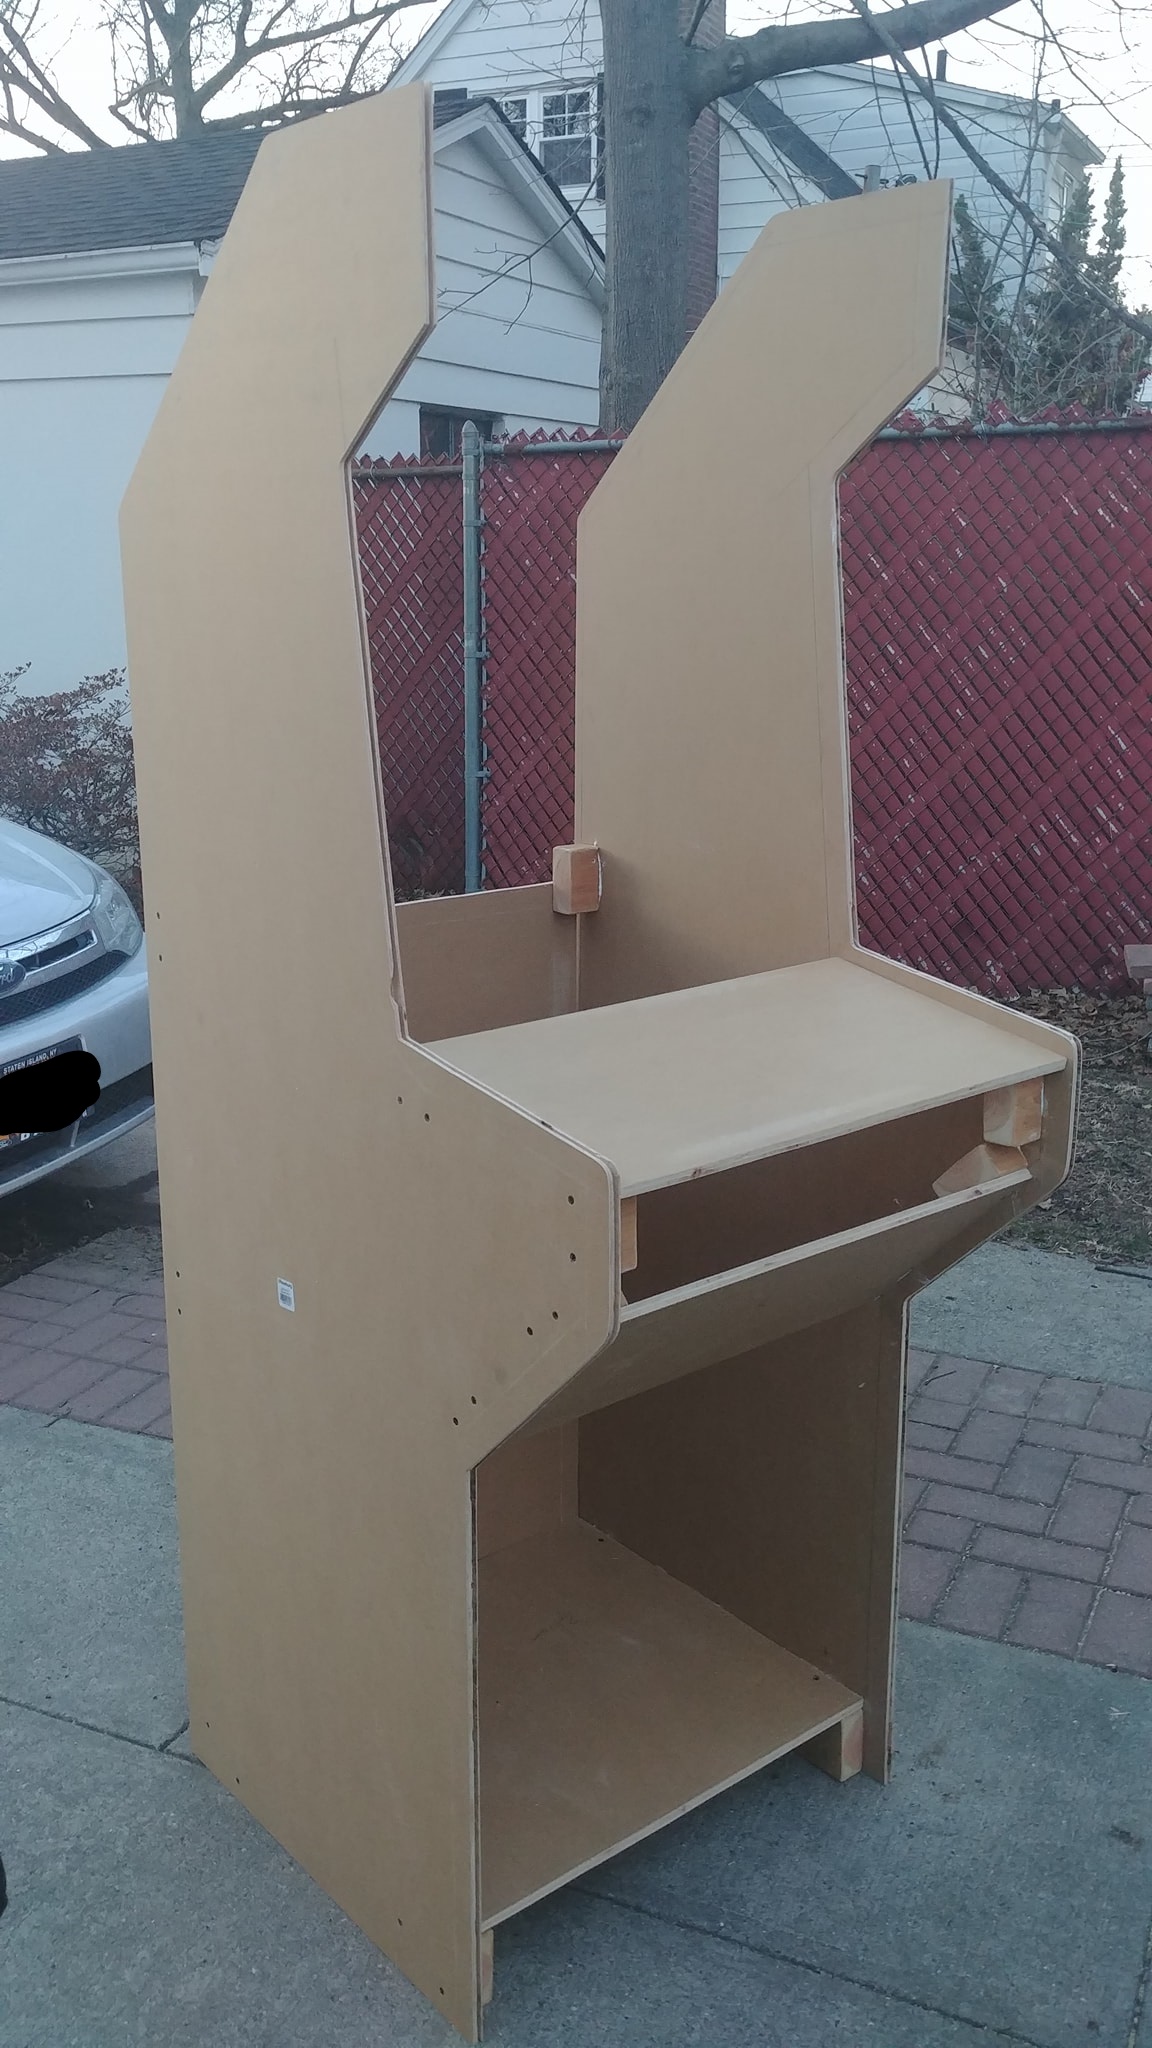
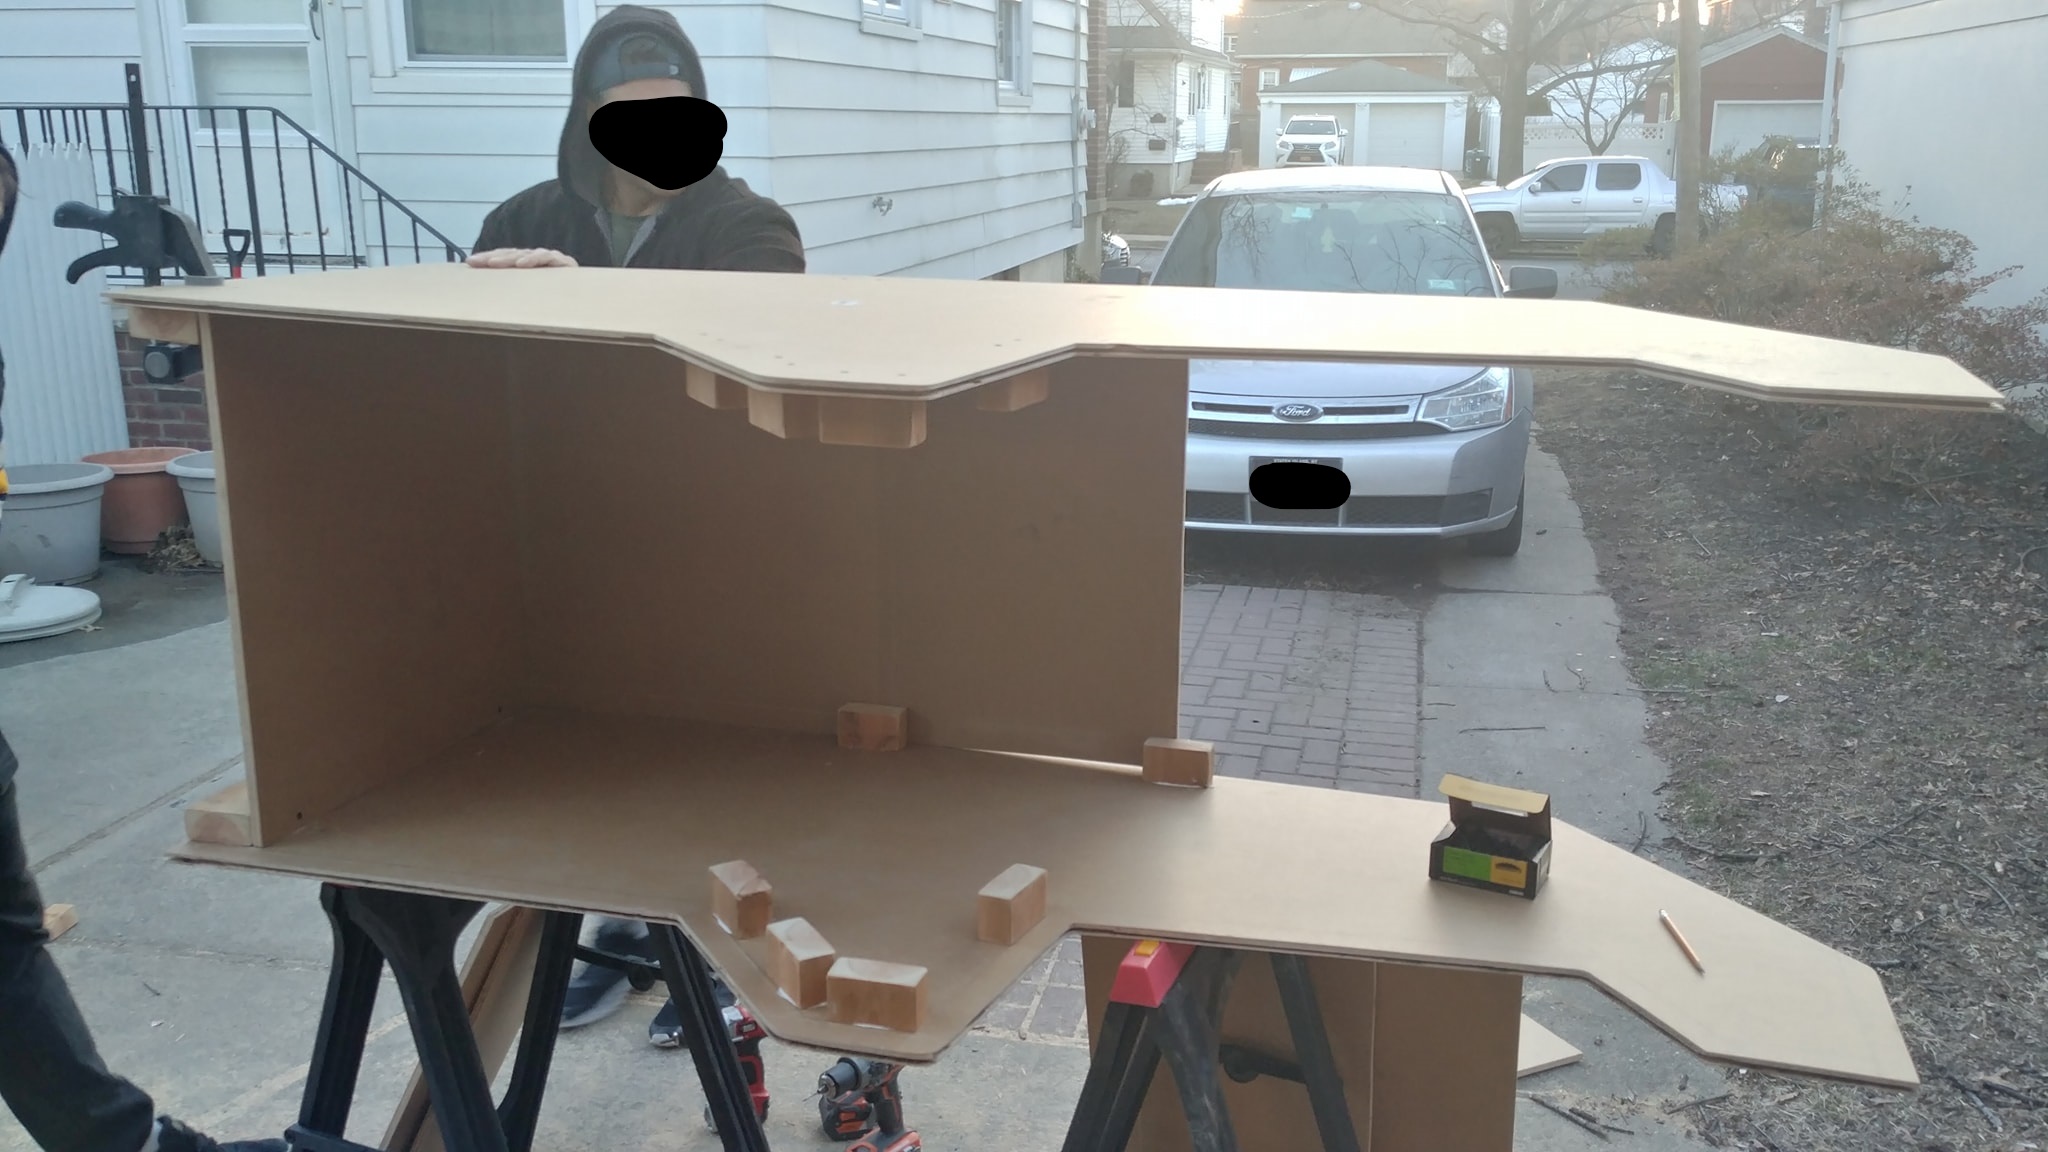
In February of 2018 a friend approached me and asked how difficult it would be to built an arcade cabinet for him to play emulators on. I told him it was just a matter of building/acquiring a shell, mounting a screen, putting together a decent computer, and wiring the buttons through a controller. Easy, right? It ended up take us nearly a year to complete while working almost every sunday, and in December of 2018 we finished not one, but two emulation cabinets. On this page I will do my best to document the build process. We didn't take photos of every step, so I'll be explaining things as best I can with limited visual aid.
I'm still going through what photos my friend and I have and also trying to recall our method as best I can. Until I have my thoughts together, this page will host relevant photos.
UPDATE 02/2020 - Added a gallery for viewing photos. New photos and details will be added soon.
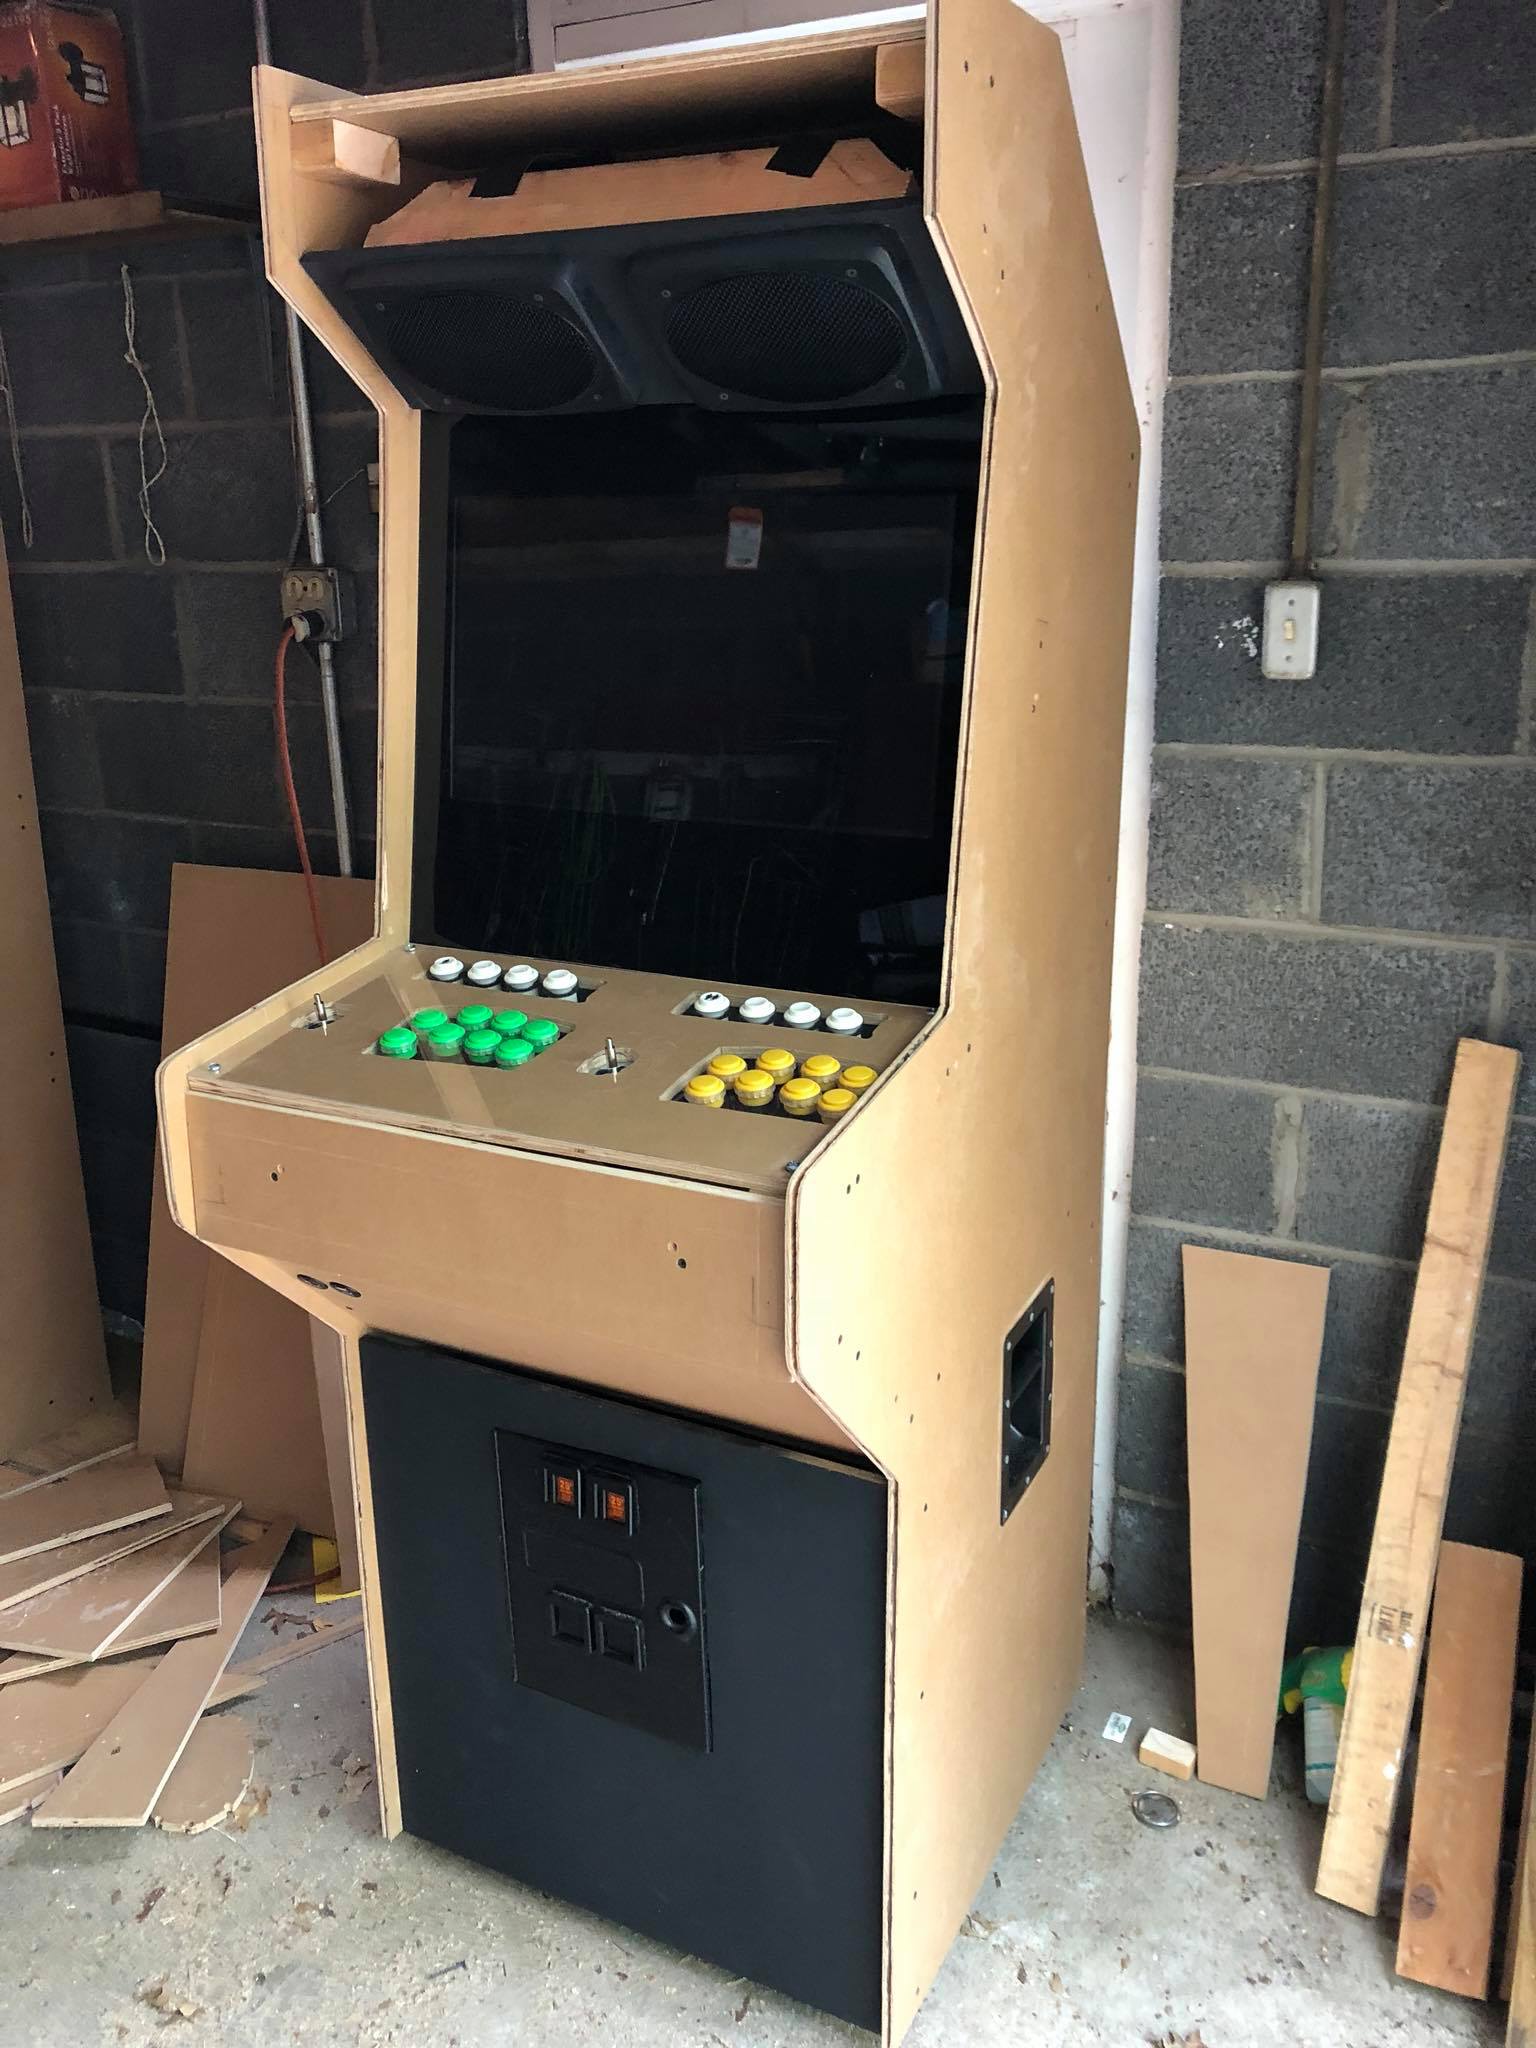
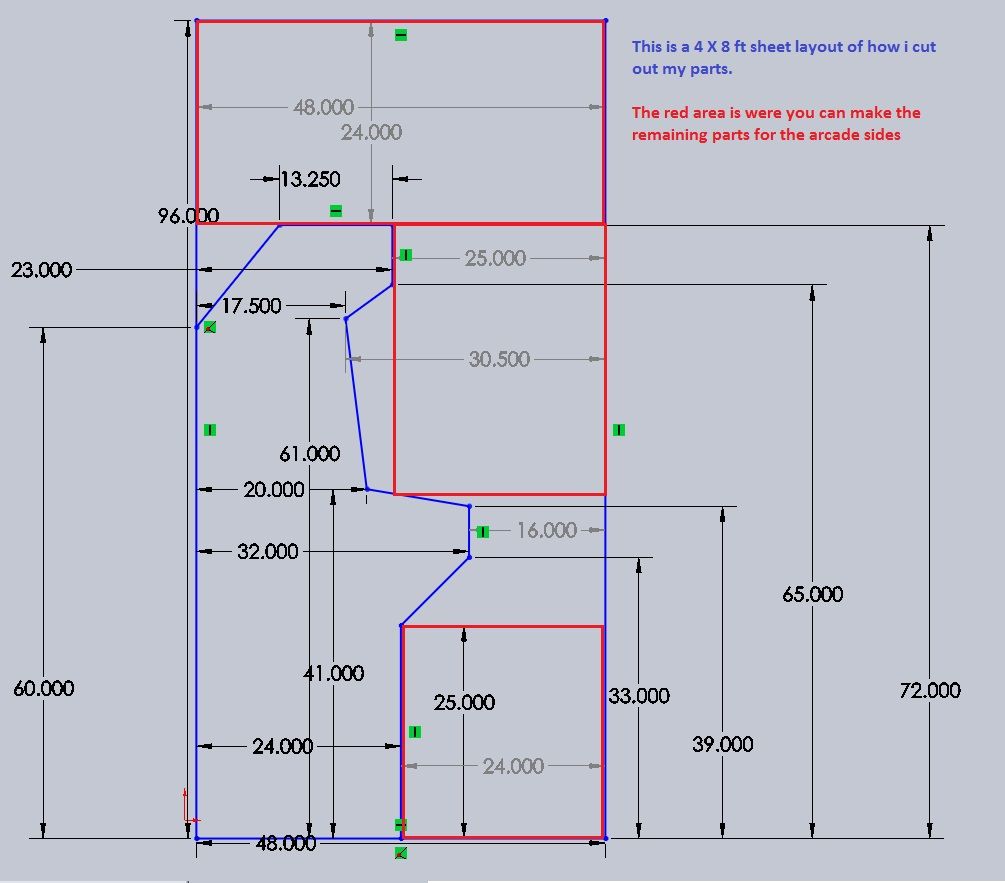
For the cabinet itself we used a template I found on instructables as it was the ideal size we were aiming for and had this easy to follow cutting guide for using two sheets of 4x8 plywood. We ended up using medium density overlay (MDO) instead of plywood as it has the smooth finish and strength of fiberboard, with the reduced weight offered by the center layer of plywood.
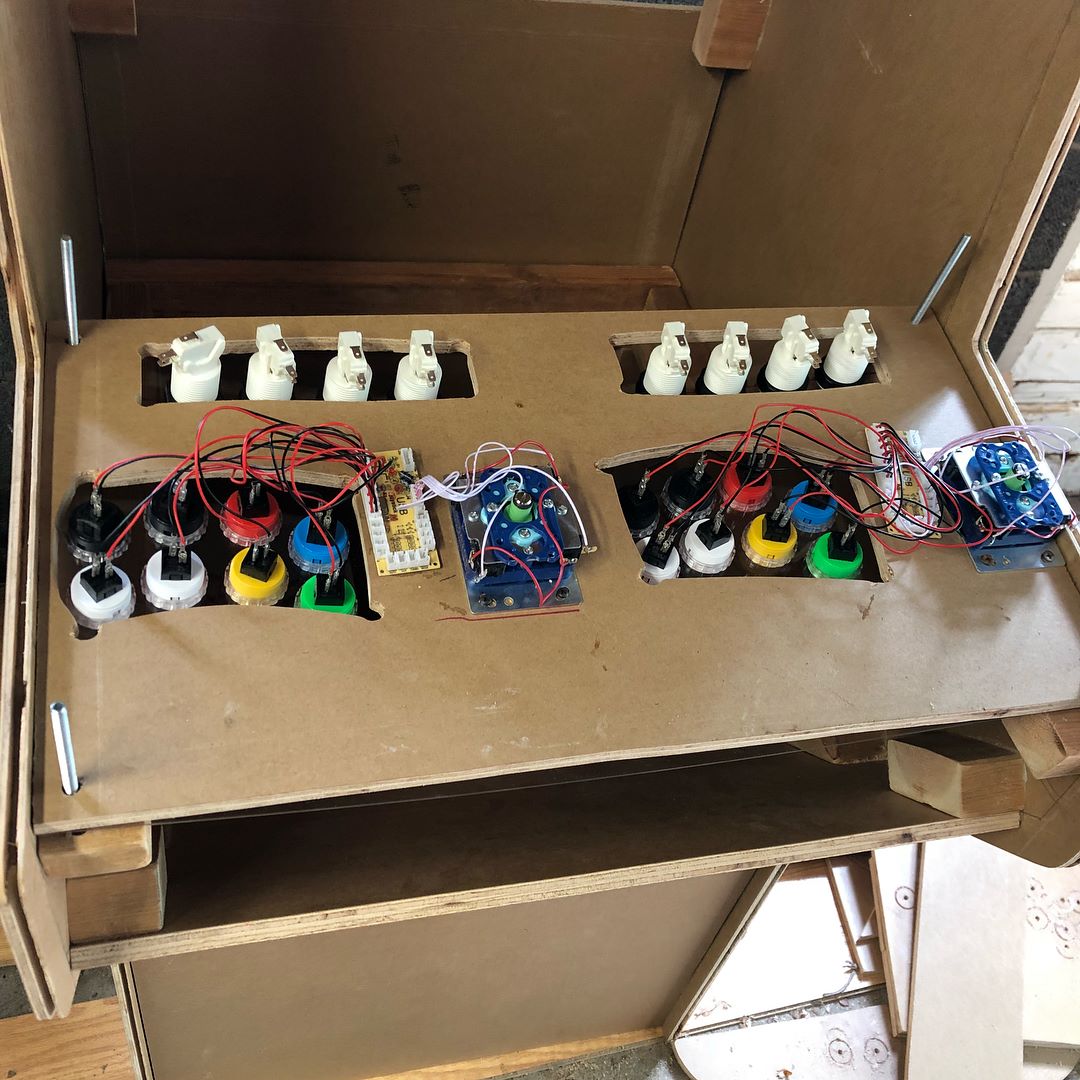
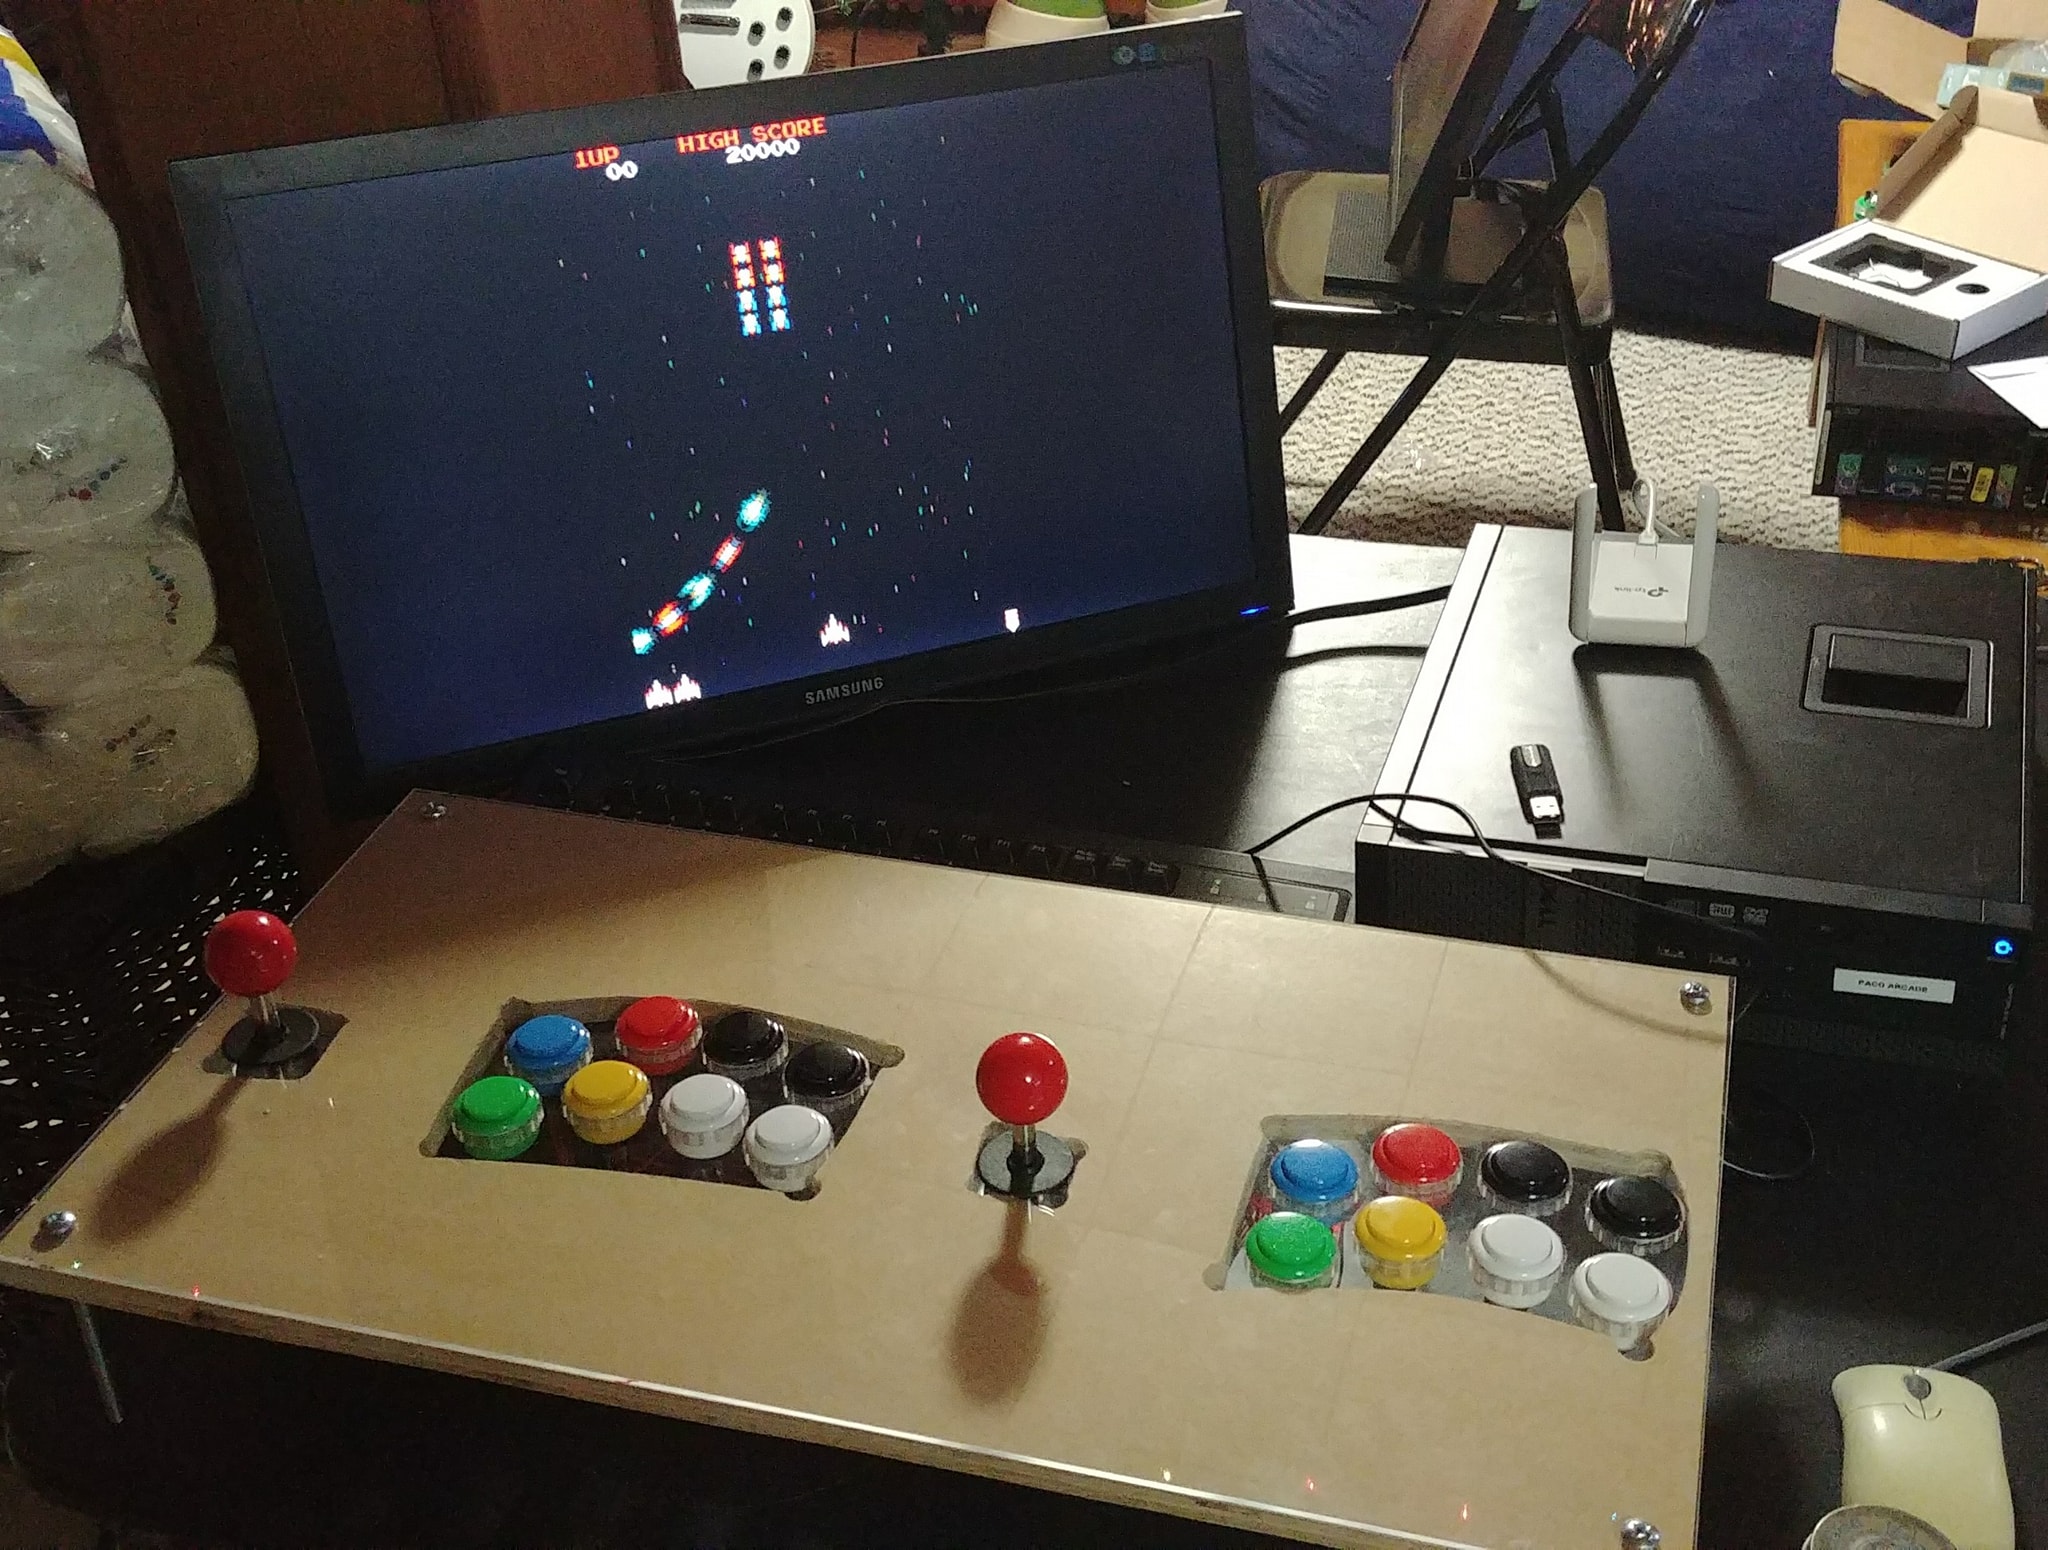
For the PCs inside we used two Dell Optiplex 790s that we found on eBay for about $100. We upped the RAM to 8GB with some spare sticks I had, threw in a GTX 710 for another $60, and connected a 4TB external drive for storing games and frontend settings. Speaking of the frontend, we settled on Launchbox Big Box due to it's ease of use, wide range of features, and extensive community and developer support. We also bought a pair of TP Link USB wireless adapters for mounting on the top of the cabinet.